

Installing and Configuring Samba Server in Red Hat Linux 7.1 on a Windows 2000 Domain
These are the steps needed to enable your Linux system to essentially “talk” to your Windows system:
Under the Samba Share Manager, open “Create a new file share”. Then the following page opens:
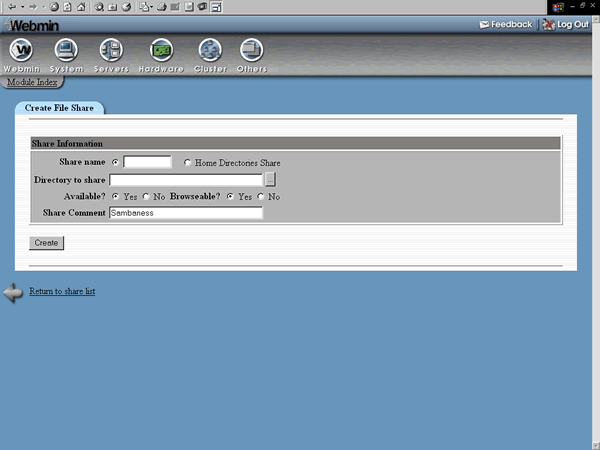
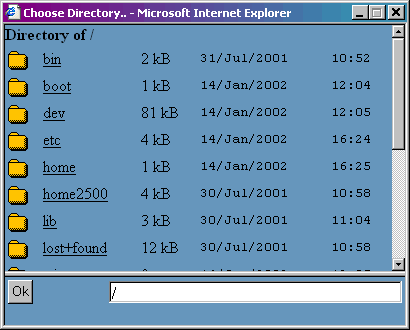
Select Share name (above) and type in the name. In this case, a user share named albert will be chosen. In “Directory to share”, open the 3-dotted link to the right and browse for the desired share.
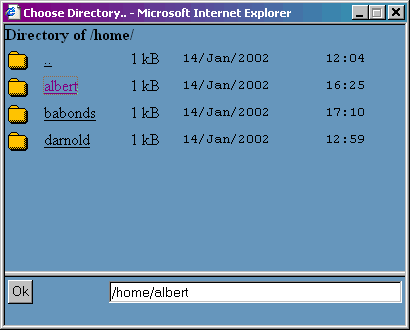
Then open the Home folder (below). Because a user Home directory is being shared, simply select the user. Here simply double-click the Home folder. Then single-click the user directory, which will be the Samba Share. Incidentally, albert is both a user account on the Linux and Windows 2000 server and the name of the Linux home directory, which is the samba share.
Double-clicking the albert folder icon will take you deeper down in the subdirectory, which is not needed. Click OK (below), to exit the small window.
Click create in the “Create File Share” window, and we have a share. Make a “Share Comment”, or description as desired. These comments (“albert home directory share”) will appear for example, next to the share name after adding a “network place”in the Network Places icon in Windows 2000.
[ To see what is being shared, at the command prompt on the Linux system: cd to the home directory, then to the user directory itself, then ls -la will do the trick. This should probably best be done, and known, beforehand.]

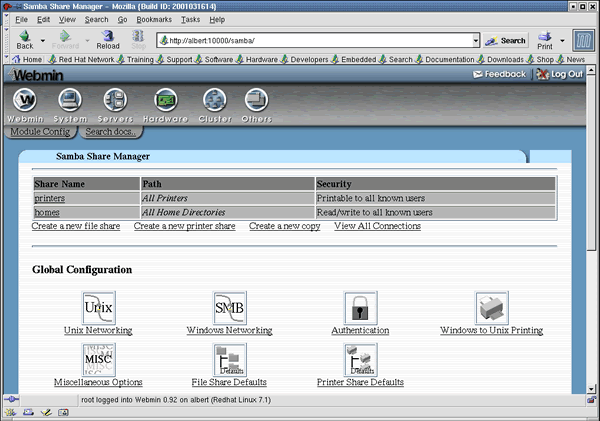
Then, select “Return to share list”, going to “Samba Share Manager”. Notice the Share Names, printers and albert. Within the latter we have the shared directory and all its files, etc.
There is also a networked printer (set up on the Linux system) within the printer share that can be printed to from the Windows system. This would also be valid for local printers attached to the Linux PC.
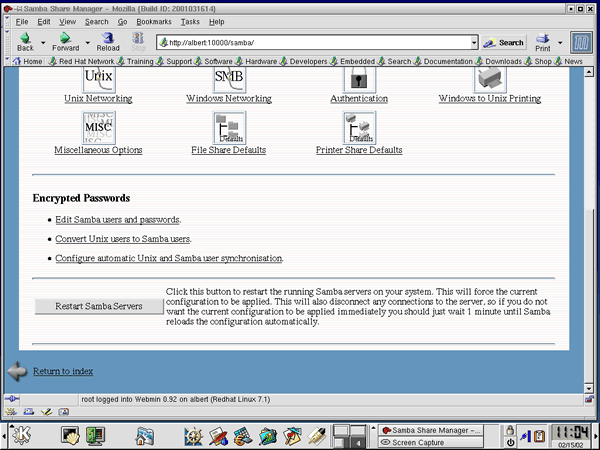
Now, the proper accounts and permissions need to be dealt with. In order for Samba to work, an account in the Windows domain must be duplicated exactly on the Linux system. Or vice versa. In other words, they must match exactly: username AND password MUST be identical, or it will not function. Scroll down past the “Global Configuration” area, go to “Encrypted Passwords” (below). Here, the “Edit Samba users and passwords”, if selected, will be empty. Unfortunately, there is no simple “Add a Samba User” utility. However, there are the 2 options below it.
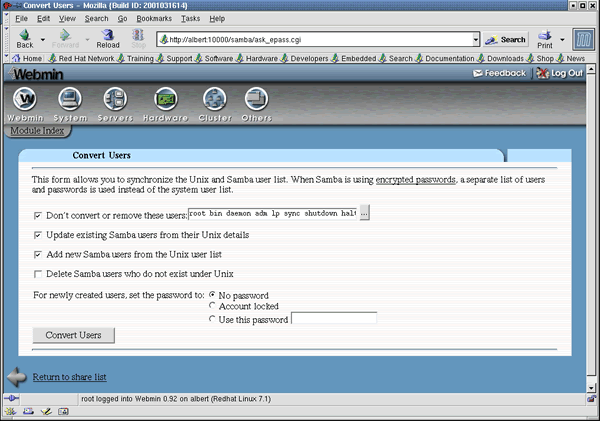
Opening the “Convert Unix users to Samba users” link from above image, we then see the screen capture below. Under “Convert Users”, notice the various options. I removed the check from “Update existing Samba users from their Unix details” but made no further changes. Select Convert Users.
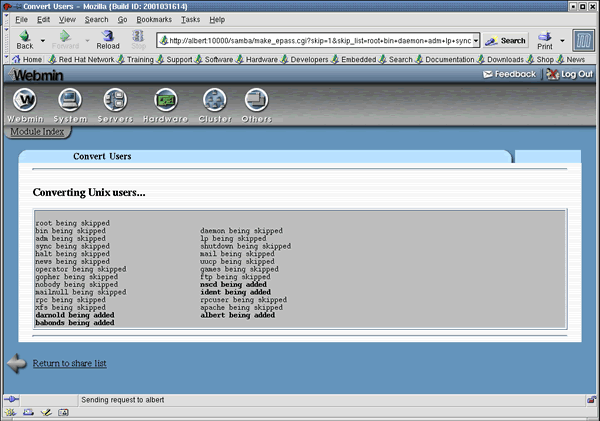
From the capture below, you can see the results of the converted user accounts. Note that most system-type accounts were not added. This worked here because this scenario involved only a few accounts. This may not be feasible in a larger organization, because maybe a System Administrator does not want these shares. It depends on company policy. But again, these folders won’t be accessible anyway unless the accounts match exactly Windows 2000 domain accounts. For the purposes here, however, this suffices for the share named albert. If you recall, that share was established earlier, and there is an account on both Linux and Windows 2000 for albert.
Now, “Return to share list”, and at the bottom of the page, click the “Restart Samba Servers”. For any and all change within Samba to take effect the server must be restarted. Command Line restart works fine too. Issue the following: service smb restart. Try service –help for more information.
Next, move to the “Global Configurations” and select “Authentication”(below). Be sure that “Use Encrypted passwords?” is Yes. Basically, all default settings are fine. Save, as needed.

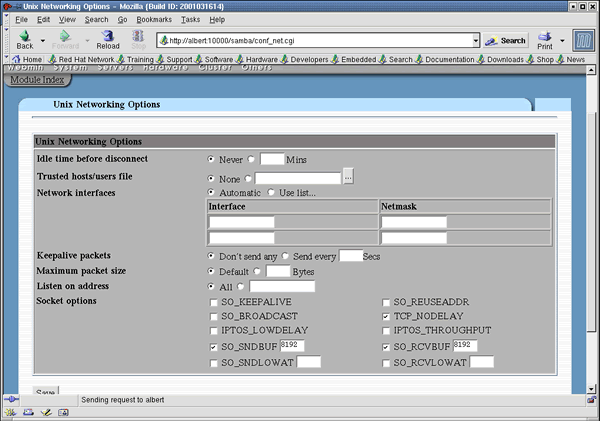
Go back, or click “Module Index”, and review “Unix Networking”(below). I kept the defaults here too. Perhaps inserting an idle time would be wise for security purposes. These can be edited at any time later. Save, as needed.
Now, perhaps the most important one: “Windows Networking”(below). In this window, the Workgroup is very important. Default MAY work for you, but I needed to type the name of our Windows 2000 DOMAIN name. Those who know Windows will notice the slight confusion with usage of Workgroup versus Domain. If your LAN has Windows Workgroups, try one (this would not pertain to Native Mode, where Active Directory is used). It will probably work. However, the domain name worked here. The remaining defaults work as well, and they are very important. Some of these may be edited later, but in this case User level Security is quite important.

——————————————————————————–
Afterthoughts:
To see a working smb.conf file, check this out!
Don’t forget, at the Linux command prompt: “man samba” gets more information than you’d ever need.