
In order to add a virtual machine to Microsoft Azure by using the cloud shell, first log into the Azure Portal account. Go to:
Https://shell.azure.com/powershell – give it a few seconds, and the interface opens:

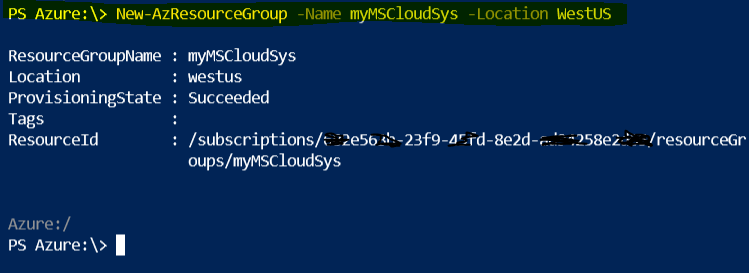
First thing to do: create a new resource group [RG] for the virtual machine, unless there is already a particular resource group available for this virtual machine. Name the RG intuitively. I own the ‘MSCloudSys.Com’ domain, so I named it similarly. I also want this to be located in the West part of the USA. Give this command [or “cmdlet”] to begin creating a new RG:
“New-AzResourceGroup -Name myMSCloudSys”
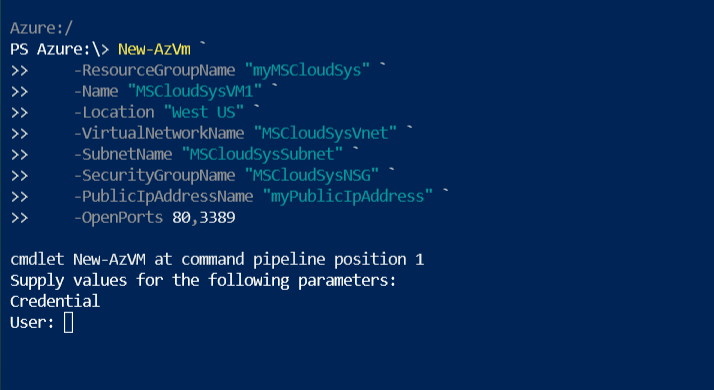
After the new resource group is created successfully, the virtual machine can be created and essentially, put inside the new resource group. The ‘cmdlet’ is:
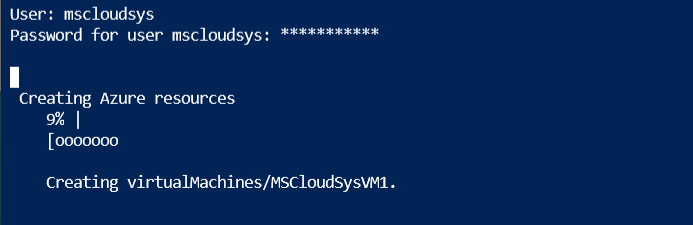
“New-AzVm” – it is followed by the needed parameters: the VM name, the RG, the Location [region], the VNET + Subnet, the Network Security Group [NSG], and the public IP + ports to be opened. In addition, there will be username and password credentials needed:
The Azure virtual machine is being created …
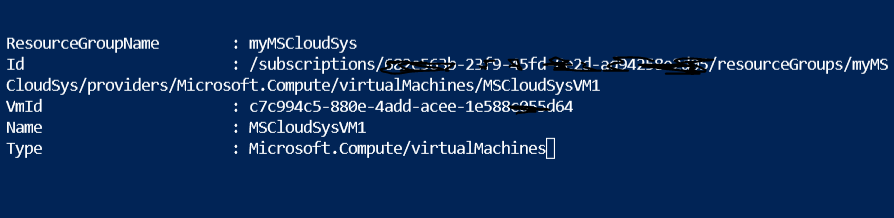
Upon completion, the summary can be seen, including VM and RG name, and various IDs:
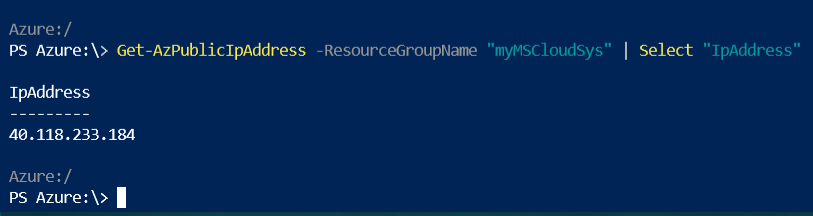
What about accessing the new virtual machine? We need an address. At the cloud shell, quickly obtain the public facing IP address with this: “Get-AzPublicIpAddress” + needed parameters:
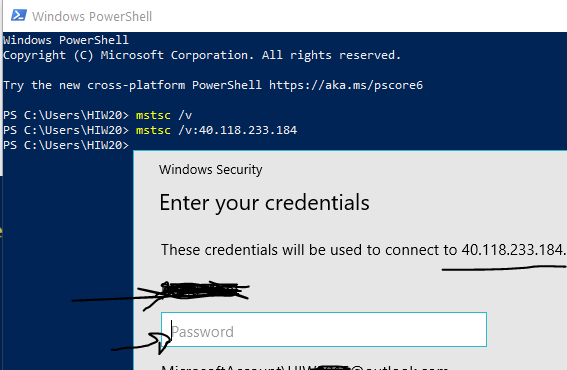
One option is to quickly open PowerShell on the local PC and issue this ‘cmdlet’:
“mstsc /v:40.118.233.184”
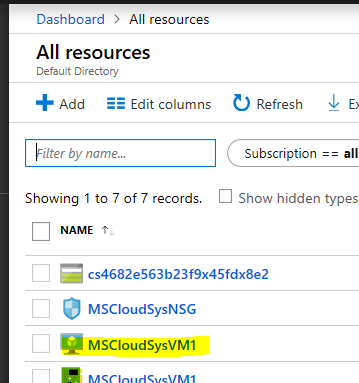
From the Azure Portal, the brand new virtual machine and associated resources can be seen: